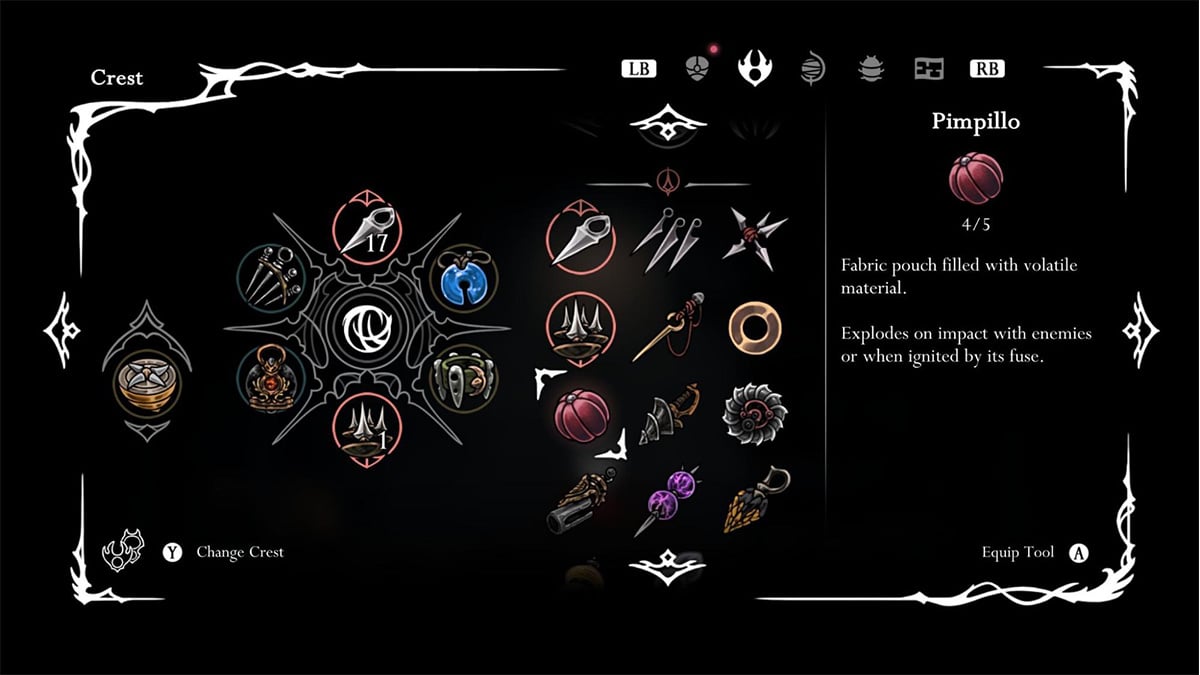
Silksong replaces the original game's Charm system with a new combat customization framework built around Crests and Tools. Instead of equipping a handful of charms with limited slots, players now build out Hornet’s kit by pairing a single Crest with up to three color-coded Tools, each providing unique combat or exploration effects. These Tools are crucial to shaping Hornet’s playstyle, giving her access to offensive gadgets, defensive perks, and passive buffs that help navigate Pharloom’s deadliest challenges.
Whether you want to fight from a distance, tank through boss phases, or reduce Silk costs while exploring, mastering the Tool system is essential for getting the most out of your run. This guide breaks down what Tools are, how they work, and every known Tool in Silksong organized by type and color.
What are Tools in Hollow Knight: Silksong?
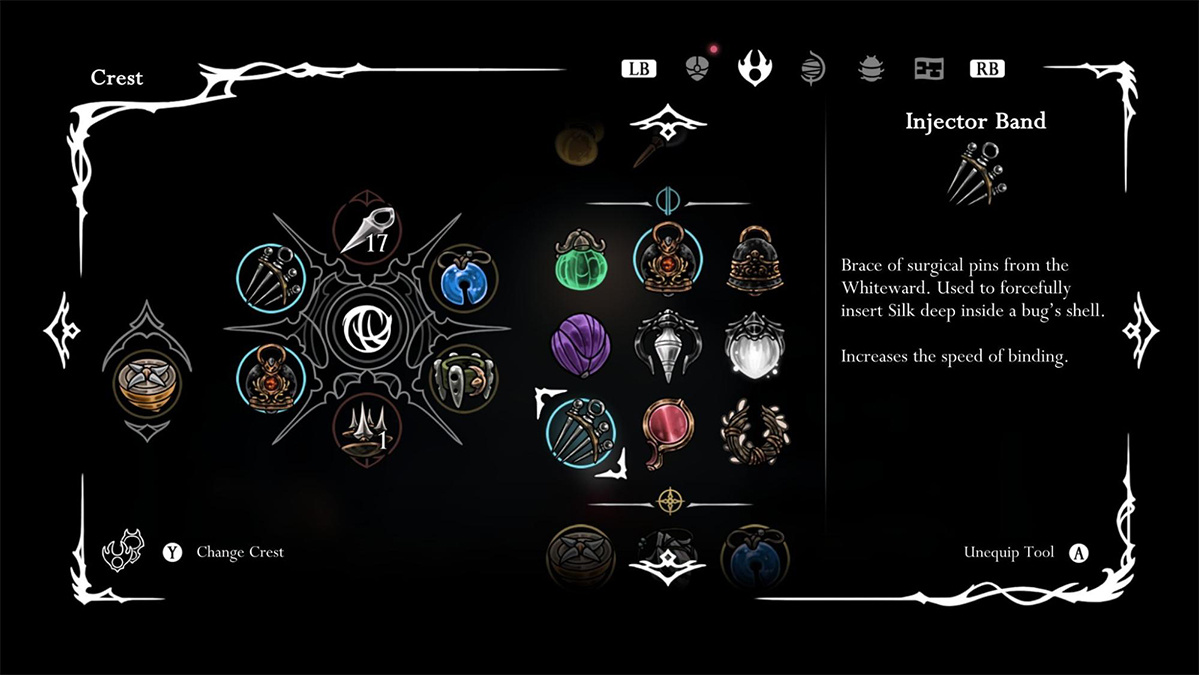
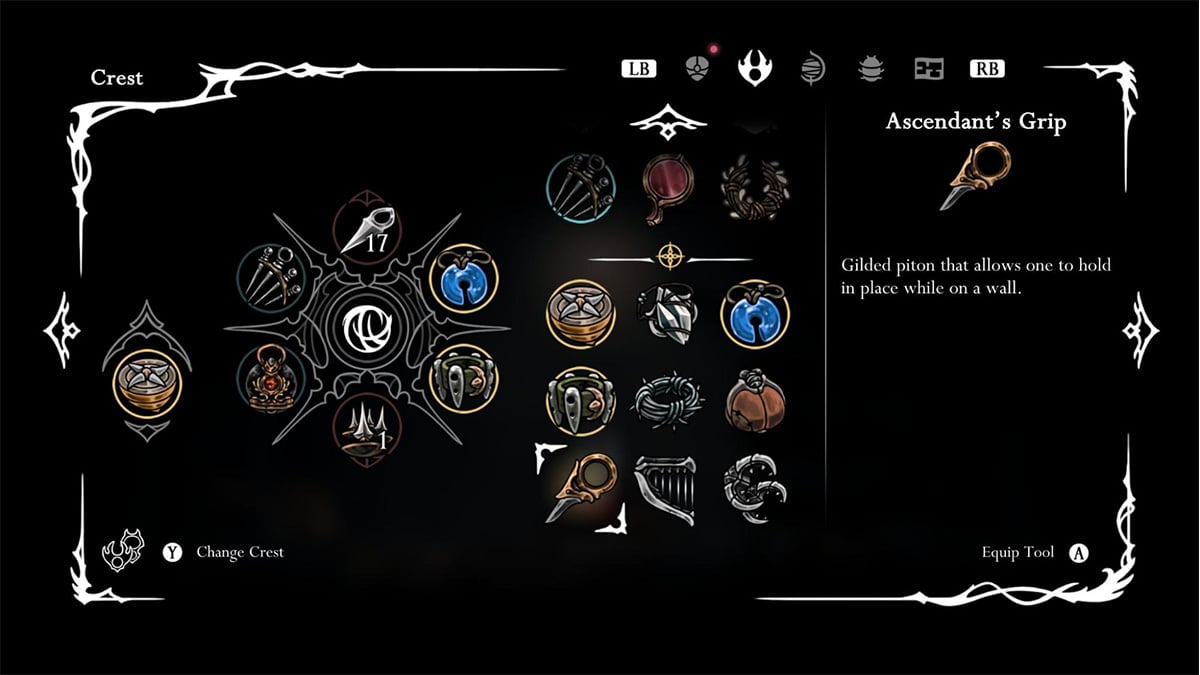
Tools are collectible items in Silksong that Hornet equips into color-coded slots granted by her currently equipped Crest. Each Tool provides an offensive or defensive effect, and when combined with the right Crest, can dramatically alter Hornet’s combat approach and Silk usage. You can only equip Tools that match the available slots on your Crest (e.g., Red slots for Red Tools), and all Tool loadouts must be set at a Bench.
There are three color types of Tools:
- Red Tools – Active combat gadgets that must be manually used. These include bombs, traps, and projectiles. They consume charges but can be refilled by collecting Shell Shards.
- Blue Tools – Passive defensive or offensive effects that work automatically. These offer benefits like hazard resistance, damage reduction, or effect applications.
- Yellow Tools – Passive offensive or exploration enhancements. These boost Hornet’s basic attacks, add effects to Tools, or unlock mobility perks.
Each Tool type plays a different role in how you approach fights, and experimenting with combinations is key to surviving Pharloom’s harshest bosses and platforming challenges.
List of all Tools in Silksong
Red Tools (Active Combat Abilities)
1. Straight Pin
- Effect: Light throwing tool designed for rapid attacks.
- Location: The Marrow — Found inside a prison cell east of The Marrow, beneath the Skarrgard mini-boss room. Free Grindle from the upper-right cell by striking the door.
2. Threefold Pin
- Effect: Flat, layered weapon crafted to be thrown in a set.
- Location: Greymoor — Near the upper-right side of Craw Lake, guarded by a Tallcraw.
3. Sting Shard
- Effect: Lethal trap that pierces enemies upon contact.
- Location: Deep Docks — Purchased from the Forge Daughter for 140 Rosaries + 1 Craftmetal.
4. Curveclaw
- Effect: Arched sharpbone used to strike flying enemies.
- Location: Hunter's March — Buy from Mottled Skarr for 140 Rosaries. If he is dead, you can fight the ants in the room above for the item.
5. Longpin
- Effect: Weighted pin designed to pierce tough shells.
- Location: Pilgrim’s Rest — Purchased from Mort for 160 Rosaries.
6. Tacks
- Effect: Short pins scattered on the ground to damage enemies.
- Location: Sinner’s Road — Reward from Crull and Benjin after completing the "Roach Guts" quest.
7. Curvesickle
- Effect: Radial sharpbone thrown to hit multiple targets.
- Location: Far Fields — Hit all targets in the target practice room using a Curveclaw, and an ant will come out and offer to upgrade your weapon.
8. Throwing Ring
- Effect: Rebounding blunt-force weapon.
- Location: Bellhart — Complete the Trail’s End Wish from Shakra.
9. Pimpillo
- Effect: Explodes on impact or when ignited.
- Location: Greymoor — Crafted at a crafting bench in Greymoor above Yarnaby's home at the cost of Craftmetal
10. Silkshot (Twelfth Architect)
- Effect: Fires Silk projectiles using canisters and Silk.
- Location: Underworks — Buy from Twelfth Architect for 130 Rosaries + 1 Craftmetal.
11. Silkshot (Forge Daughter)
- Effect: Same effect as above; different appearance and lore.
- Location: Deep Docks — Buy from Forge Daughter for 260 Rosaries + 1 Craftmetal.
12. Conchcutter
- Effect: Ricocheting spiral weapon thrown at an angle.
- Location: Sands of Karak — Found at a glowing shrine in Coral Tower.
13. Silkshot (Restored)
- Effect: Restored form of the Silkshot; fires Silk-powered projectiles.
- Location: Mount Fay — Bring the Ruined Tool (from Bilewater) to the chamber just below the top of Mount Fay and fix it yourself using 1 Craftmetal.
14. Delver’s Drill
- Effect: Spins downward to bore into enemies and terrain.
- Location: Underworks — Found on a table at the bottom of the Grand Gate path.
15. Cogwork Wheel
- Effect: Propelled spinning blade that slices through foes.
- Location: Underworks — Buy from the Twelfth Architect for 360 Rosaries + 1 Craftmetal.
16. Snare Setter
- Effect: Sets a Silk trap that ignites on contact.
- Location: Moss Grotto (Weavenest Atla) — Reward from the Caretaker after completing the Silk and Soul Wish.
17. Flintslate
- Effect: Temporarily adds fire damage to Hornet’s needle.
- Location: Deep Docks — Found on a table east of the Forge Daughter.
18. Cogfly
- Effect: Flying cog companion that attacks enemies.
- Location: High Halls — Crafted at a workbench found up the third left-side passage of the eastern vertical shaft.
19. Needle Phial
- Effect: Charges up and pierces targets to extract fluids.
- Location: Wormways — Reward from completing the Alchemist Assistant’s Wish.
20. Flea Brew
- Effect: Temporarily increases movement and attack speed.
- Location: Rewarded by Grishkin after completing the "Lost Fleas" quest.
21. Plasmium Phial
- Effect: Grants Hornet temporary bonus health.
- Location: Wormways — Reward from completing the Alchemist Assistant’s Wish.
Blue Tools (Defensive & Offensive)
1. Druid's Eye
- Effect: As the bearer takes damage, the amulet weeps a green elixir that forms into Silk.
- Location: Mosshome — Reward for completing the Moss Druid’s “Berry Picking” quest (collect 3 Mossberries).
2. Druid's Eyes (Upgraded)
- Effect: Same as Druid’s Eye, but more powerful.
- Location: Moss Grotto (Moss Home) — Trade 4 more Mossberries to the Moss Druid after getting the original Druid’s Eye.
3. Magma Bell
- Effect: Reduces damage taken from flame and magma.
- Location: Deep Docks — Buy from the Forge Daughter for 110 Rosaries + 1 Craftmetal.
4. Fractured Mask
- Effect: Shields against critical damage once. Shatters on impact but repairs at a bench.
- Location: Hunter’s March — Sold by Mottled Skarr for 260 Rosaries.
5. Pollip Pouch
- Effect: Applies venom to equipped tools.
- Location: Shellwood — Reward for completing the Greyroot’s Wish, “Rite of the Pollip.”
6. Warding Bell
- Effect: Shields the bearer while binding (healing).
- Location: Far Fields — Found via secret passage on the bottom-left portion of the vertical pathway after finishing the Seamstress quest.
7. Multibinder
- Effect: Extends healing duration but increases its effect.
- Location: Bellhart — Complete the “My Missing Courier” quest, then buy from Frey for 880 Rosaries.
8. Weavelight
- Effect: Increases the speed of Silk regeneration.
- Location: Moss Grotto (Ruined Chapel) — Found where you fight the Moss Mother.
9. Sawtooth Circlet
- Effect: Spins serrated blades when flaring cloak, damaging surrounding enemies.
- Location: Underworks (Twelfth Architect) — Buy for 230 Rosaries + Craftmetal.
10. Reserve Bind
- Effect: Stores an extra Bind’s worth of Silk, used when low. Restores at a bench.
- Location: High Halls — Defeat the Second Sentinel in The Forum.
11. Spool Extender
- Effect: Allows storing additional Silk beyond default limit.
- Location: Choral Chambers (Songclave) — Purchase from Jubilana for 720 Rosaries after completing the “Wandering Merchant” Wish.
12. Injector Band
- Effect: Increases speed of binding.
- Location: Whiteward — Found near the NPC Sherma.
13. Claw Mirror
- Effect: Emits a dazzling flash that damages enemies while binding.
- Location: Whispering Vaults — Defeat Trobbio in “The Stage.”
14. Claw Mirrors (Upgraded)
- Effect: Emits a searing blast damaging nearby enemies while binding.
- Location: Whispering Vaults — Defeat Tormented Trobbio in “The Stage.”
15. Memory Crystal
- Effect: Taking damage forms a memory that shatters into spines when enemies touch it.
- Location: Mount Fay — Behind an ice block deep in the Mount Fay tunnels.
16. Quick Sling
- Effect: Doubles the number of Tools thrown.
- Location: Bilewater — Found in a secret area with breakable ceilings above the Mothleaf Lagnia area.
17. Volt Filament
- Effect: Imbues Silk Skills with electric charge.
- Location: Mount Fay — Defeat the Voltvyrm boss.
18. Snitch Pick
- Effect: Steals Rosaries and Shell Shards from enemies, dealing damage.
- Location: Blasted Steps — Purchase from Grindle for 740 Rosaries.
19. Wreath of Purity
- Effect: Repels Muckmaggots. Restores at a bench if broken.
- Location: Putrified Ducts — Found in a hidden passage east of the Bellway.
20. Longclaw
- Effect: Increases range of needle attacks.
- Location: Bilewater — Reward for completing the Broodfeast Wish.
21. Wispfire Lantern
- Effect: Spawns wisps that burn enemies using Silk.
- Location: Underworks — Defeat the Father of Flame boss.
22. Pin Badge
- Effect: Reduces charge time for Needle Strike.
- Location: Mount Fay — Defeat the Pinstress boss.
23. Egg of Flealia
- Effect: Decreases Silk Skill cost while health is full.
- Location: Fleatopia — Reward from Fleamaster Mooshka after finding all 29 Lost Fleas.
Yellow Tools (Utility & Support)
1. Compass
- Effect: Marks your location on the map.
- Location: Bone Bottom or Bellhart — Buy from Shakra for 70 Rosaries. She can also be found occasionally while you're exploring the map, but will always be available at either Bone Bottom or Bellhart.
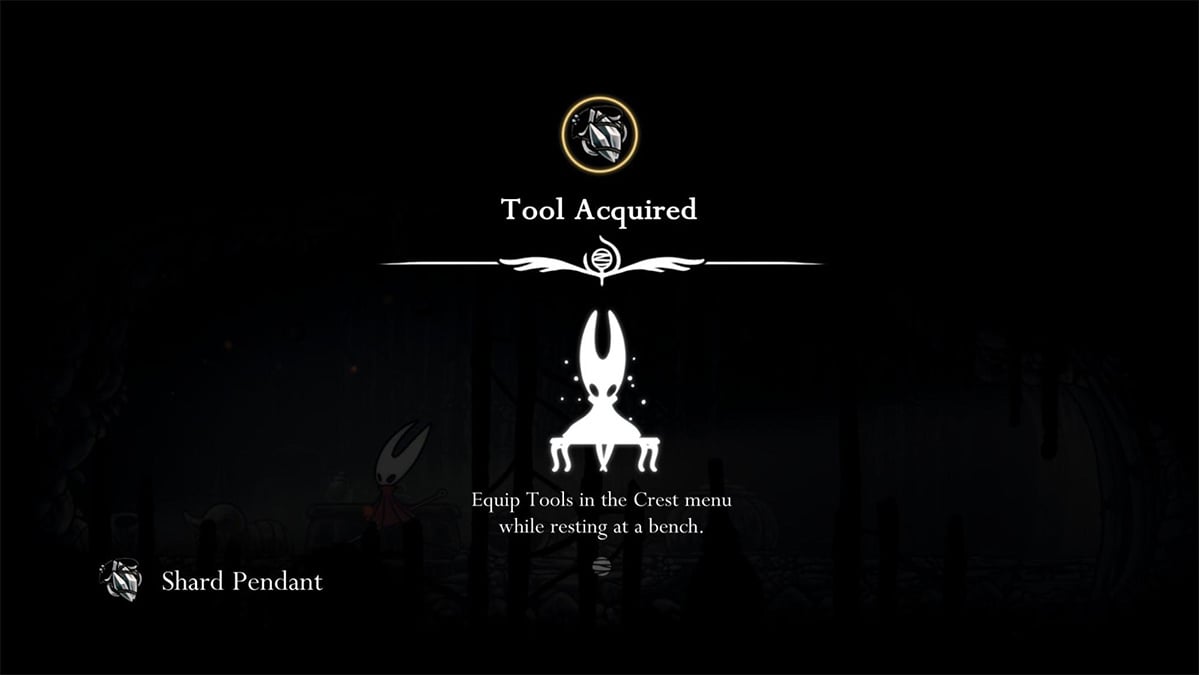
2. Shard Pendant
- Effect: Increases Shell Shard collection from defeated enemies.
- Location: The Marrow — Found inside a room to the left of the collapsing platforms.
3. Magnetite Brooch
- Effect: Pulls loose Rosaries toward the wearer.
- Location: Bone Bottom — Buy from Pebb for 120 Rosaries.
4. Dead Bug’s Purse
- Effect: Retains some Rosaries upon defeat.
- Location: Wormways — Looted from a corpse after a fight with 2 Gromlings.
5. Barbed Bracelet
- Effect: Increases both damage taken and damage dealt.
- Location: Sinner’s Road — Found on a table while exploring the tunnels.
6. Weighted Belt
- Effect: Reduces recoil from both attacking and taking damage.
- Location: Pilgrim’s Rest, Far Fields — Buy from Mort for 160 Rosaries.
7. Shell Satchel
- Effect: Increases the quantity of crafted tools.
- Location: Wormways — Found on a bug corpse in the area while playing the game on Steel Soul mode.
8. Magnetite Dice
- Effect: Believed to bring luck; used in games.
- Location: Blasted Steps — Win 10 rounds in the gambling game with Lumble the Lucky.
9. Scuttlebrace
- Effect: Increases movement flexibility and allows quick retreat.
- Location: Underworks — Buy from the Twelfth Architect for 140 Rosaries + 1 Craftmetal.
10. Silkspeed Anklets
- Effect: Increases sprint speed using Silk.
- Location: Far Fields (Weavenest Cindril) — Found at the end of a secret room. Requires Needolin and Swift Step.
11. Spider Strings
- Effect: Expands and strengthens the effects of the Needolin.
- Location: Choral Chambers (Songclave) — Buy from Jubilana for 320 Rosaries after completing the “Wandering Merchant” Wish.
12. Ascendant’s Grip
- Effect: Allows the bearer to cling to walls.
- Location: Choral Chambers (Songclave) — Buy from Jubilana for 350 Rosaries after the “Wandering Merchant” Wish.
13. Thief’s Mark
- Effect: Gain extra Rosaries from enemies, but lose some when taking damage.
- Location: Blasted Steps — Buy from Grindle for 350 Rosaries.
Conclusion: Use the right tools for the right moment
After combing through all the Red, Blue, and Yellow Tools in Silksong, you might expect a definitive ranking or a “best tools” list. But the truth is, there isn’t one. Every Tool in Silksong is designed with situational strength in mind. Some shine in platforming-heavy boss fights. Others are essential for resource farming, crowd control, or exploration. The game rewards players who experiment, adapt, and learn when to swap out their loadout. There is no single setup that works for every situation. You’ll find success not by relying on the “strongest” Tool, but by understanding which Tool fits which challenge.
So try them all. Mix and match. Find your flow. In Pharloom, mastery comes from timing, positioning, and preparation. Your Tools are just as important as your Needle.
If you’re ready to put those strategies into practice, don’t miss our Silksong Best Early Game Tips and Tricks to build a strong foundation, and check out Hardest Bosses in Silksong Ranked to see how the right loadout can turn the tide in Pharloom’s toughest battles.
FAQ about Tools in Silksong
What are Tools in Silksong?
Tools are special items that grant Hornet unique abilities in both combat and exploration. They replace the Charm system from the original Hollow Knight and are equipped through Crests. Tools shape your entire playstyle, from how you attack to how you navigate the world.
How many Tools are there in Silksong?
There are 42 known Tools in the game, divided into three types.
- Red Tools (21 total) – Active-use weapons and gadgets like projectiles, traps, bombs, and drills. These typically consume Shell Shards or Silk.
- Blue Tools (8 total) – Passive tools that enhance defense or offense, such as extra healing or longer nail reach.
- Yellow Tools (13 total) – Passive tools focused on utility and support, including loot bonuses, mobility upgrades, and exploration aids.
What are Crests and how do they work with Tools?
Crests are loadout frameworks that determine your Tool slots, Silk capacity, and Hornet’s core moveset. You can only equip one Crest at a time, but each one allows for different Tool combinations. Crests are swapped at Benches.
Where do I find Tools in Silksong?
Tools are found across Pharloom through exploration, completing side quests known as Wishes, beating bosses, crafting at workbenches, or purchasing from NPCs. Some Tools are hidden in late-game areas, while others appear early on.
Can I use all Tools at once?
No. You’re limited by the Crest you equip, which controls how many Tools you can use and what types they support. This forces you to think strategically about your loadout for each area or boss.
What is the best Tool in Silksong?
There is no single best Tool. Each Tool has a unique purpose, and the most effective ones will vary depending on your playstyle, current location, or enemy type. You’re meant to experiment and adapt.
Do Tools have usage costs?
Yes, Red Tools consume Shell Shards when used. Blue and Yellow Tools are passive and do not require resources once equipped.
Can I change Tools during gameplay?
You can only change Tools at Benches. Plan ahead when entering new areas or before boss fights.
Recommended Products