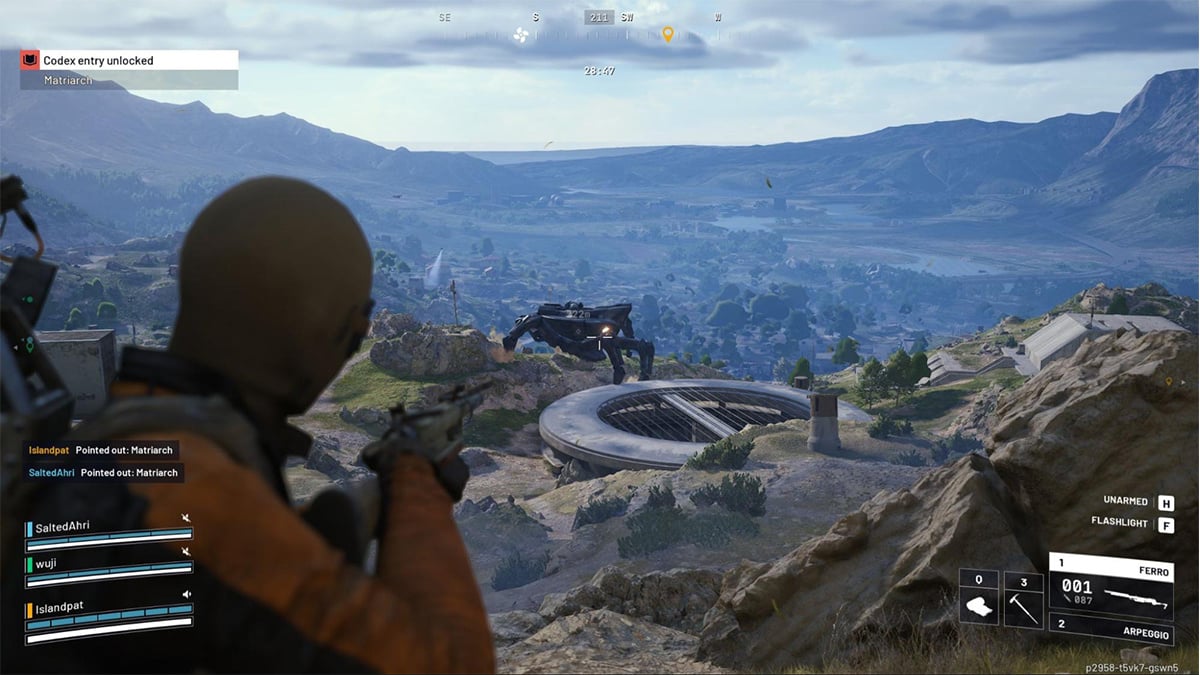
ARC Raiders throws a lot of metal at you: from tiny suicide drones that delete your shields to flying artillery platforms that can wipe a squad in seconds. When you first drop, it can feel like every Arc enemy is unfairly tanky, brutally accurate, and not even worth the ammo they cost. This guide is here to prove the opposite. We will walk through every enemy in ARC Raiders, explain how their aggro and attack patterns work, show you where the real weak points are, and highlight which bots are actually loot piñatas in disguise. By the end, you will know which Arcs to avoid, which ones to farm, and exactly how to break each unit for maximum drops and XP without wasting your team’s time or resources.
Note: This article has been updated to reflect patch 1.4
1. Wasp
Loot: ARC Alloy, ARC Powercell, Wasp Driver, Light Ammo
XP: 100 XP for destroying it, 200 XP for looting
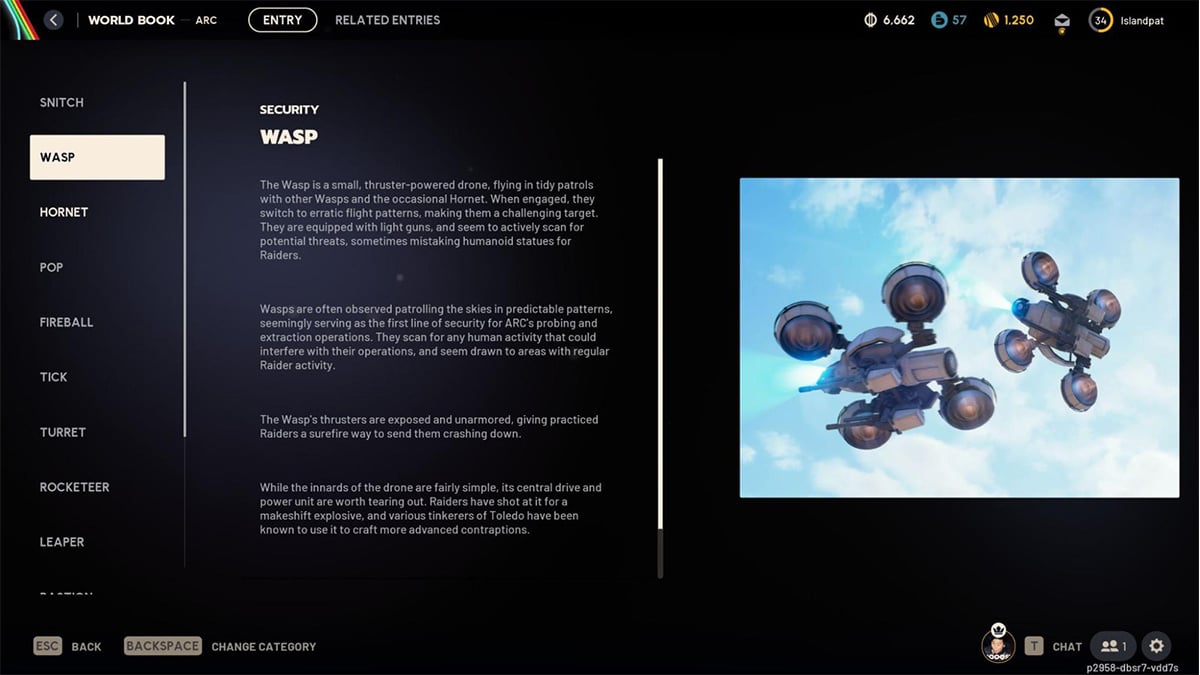
Wasps are small, unarmored aerial recon drones that become dangerous the moment they get a clean angle on you. They hover at mid-range, scan aggressively, and flash a red targeting laser right before firing. Individually they’re fragile, but in groups (especially when paired with a Hornet) they can shred shields instantly and force you out of cover.
Attack pattern: Once alerted, the Wasp locks onto a target using a red laser, then fires a burst of light ammo. The burst is short but extremely efficient at breaking shields, and Wasps will constantly reposition to maintain a firing angle if you duck behind cover.
Weakpoints & strategy: The thrusters are the only part of the Wasp that matters. Breaking any two thrusters removes its lift, causing it to spiral downward and explode. Heavy rounds destroy each thruster with minimal shots, while medium ammo also works well if you can track their movement. Shooting the body wastes time and ammo, so always wait for the moment the thrusters are exposed as it hovers or turns.
2. Hornet

Loot: ARC Alloy, ARC Powercell, Hornet Driver, Simple Gun Parts, Medium Ammo
XP: 150 XP for destroying it, 250 XP for looting
Hornets are medium-sized aerial drones often patrolling alongside Wasps or guarding larger ARC units on the ground. At a distance they can be mistaken for Wasps, but their armored front thrusters and bulkier frame give them away up close. While tougher overall, Hornets are often easier to kill than they look—unless they arrive with a pack of Wasps or as part of a Snitch reinforcement call, where their stun darts can quickly overwhelm an unprepared squad.
Attack pattern: When aggroed, the Hornet charges a dart gun that fires a slow but high-impact shock projectile. A red targeting laser marks the shot before release. If it connects, the dart stuns the target and deals moderate damage, leaving you vulnerable to follow-up attacks from other ARCs.
Weakpoints & strategy: The Hornet’s two rear thrusters are fully exposed and should always be your first target. The front thrusters are heavily armored and resist light and medium ammo, making them inefficient to shoot. Breaking both rear thrusters instantly drops the drone out of the sky, and even destroying just one can throw it into an unstable spiral. Heavy rounds knock out thrusters fast, but even medium ammo works reliably from the right angle.
3. Snitch

Loot: ARC Alloy, ARC Powercell, ARC Synthetic Resin, Sensors, Snitch Scanner
XP: 100 XP for destroying it, 200 XP for looting
Snitches are small, unarmored recon drones designed only to detect Raiders and call in reinforcements. They hover with a slow 360-degree scan pattern, and once they spot a player, they briefly enter an alert state before firing a beacon that summons a dangerous wave consisting of two Wasps and one Hornet. The noise from this alert often attracts nearby players as well, which can easily turn a safe route into a risky engagement.
Attack pattern: Snitches have no offensive attacks. Their only function is to detect you and trigger a beacon that calls in multiple flying ARCs.
Weakpoints and strategy: All three thruster panels are exposed and extremely fragile. Any ammo type can break them, but the goal is to destroy the Snitch before it launches its beacon. Stay out of its scanning cone, avoid making noise near it, and eliminate it immediately if it becomes alerted.
4. Rocketeer

Loot: Main debris: ARC Alloy, ARC Powercell, ARC Motion Core, ARC Circuitry, Advanced ARC Powercell, Heavy Gun Parts, Rocketeer Driver, Heavy Ammo; Small debris: ARC Alloy, ARC Powercell, Advanced ARC Powercell, Rocketeer Driver
XP: 500 XP for destroying it, 500 XP per part looted
Rocketeers are heavily armored aerial ARCs and one of the most dangerous enemies in ARC Raiders. Their guided missiles hit extremely hard, and their ability to rapidly reposition in the air makes them lethal if you fight them without cover. Rocketeers often appear alone, but even a single one can wipe an entire squad if it catches players in the open.
Attack pattern: When targeting a player, the Rocketeer lines up four yellow lasers that shift to red before releasing a barrage of guided rockets. These rockets track aggressively and carry strong area-of-effect damage. The audio cue during lock-on is your signal to start moving and break line of sight.
Weakpoints and strategy: The Rocketeer’s thrusters are the most reliable weak point. Heavy ammo is strongly recommended, as breaking two thrusters sends the Rocketeer crashing to the ground and dealing damage to itself. When the unit pauses to reload, a red glowing core is briefly exposed and can be targeted for additional damage. Showstoppers or Hornet Drivers can be thrown to stun it in midair, forcing it to fall and giving you a large damage window. Always fight from behind solid cover and avoid open spaces whenever possible.
5. Tick

Loot: ARC Alloy, Tick Pod
XP: 50 XP for destroying it, 100 XP for looting
Ticks are small, spider-like ARCs that cling to walls, floors, and ceilings, usually in dark indoor areas such as bunkers and abandoned structures. They travel in small groups and rely on close-range ambushes rather than raw durability. Although they have very low health and no detachable parts, they can be dangerous if they latch onto a Raider who is already under pressure from other enemies.
Attack pattern: When a player enters their detection radius, Ticks emit a high-pitched screech, launch themselves forward, and attempt to latch onto the target. Once attached, they deal continuous damage until removed by repeatedly pressing the action key or by having a teammate shoot them off. Certain augments, such as Looting MK. 2, automatically shake them off after a brief delay.
Weakpoints and strategy: Ticks have no armor plating and can be eliminated instantly with virtually any weapon. Melee weapons are ideal because they kill Ticks quietly and avoid drawing unwanted attention from nearby ARCs. If one leaps toward you, dodge sideways and attack as soon as it lands. If it manages to latch on, remove it quickly before the damage stacks up.
6. Pop

Loot: ARC Alloy, ARC Powercell, Crude Explosives, Pop Trigger
XP: 50 XP for destroying it, 100 XP for looting
Pops are small, fast suicide drones that rush directly at Raiders as soon as they detect
movement or sound. They behave like miniature Fireballs but move faster and detonate sooner, making them one of the most punishing close-range threats if ignored. Their health pool is extremely low, so the danger comes entirely from letting them reach you.
Attack pattern: Pops emit a distinct beeping noise when they aggro, with the beep rate increasing as they get closer. Once in range, they detonate and deal heavy area-of-effect damage that can break shields and severely wound anyone caught in the blast.
Weakpoints and strategy: Pops have no armor plating and can be destroyed instantly with even the weakest weapons. The key is to eliminate them before they close the distance. Keep a few meters of space, backpedal if needed, and fire as soon as you hear their signature beep. If you are trying to differentiate them from Fireballs for mission objectives, you can tag them to mark which target you are tracking.
7. Fireball
Loot: ARC Alloy, ARC Powercell, Fireball Burner
XP: 50 XP for destroying it, 100 XP for looting
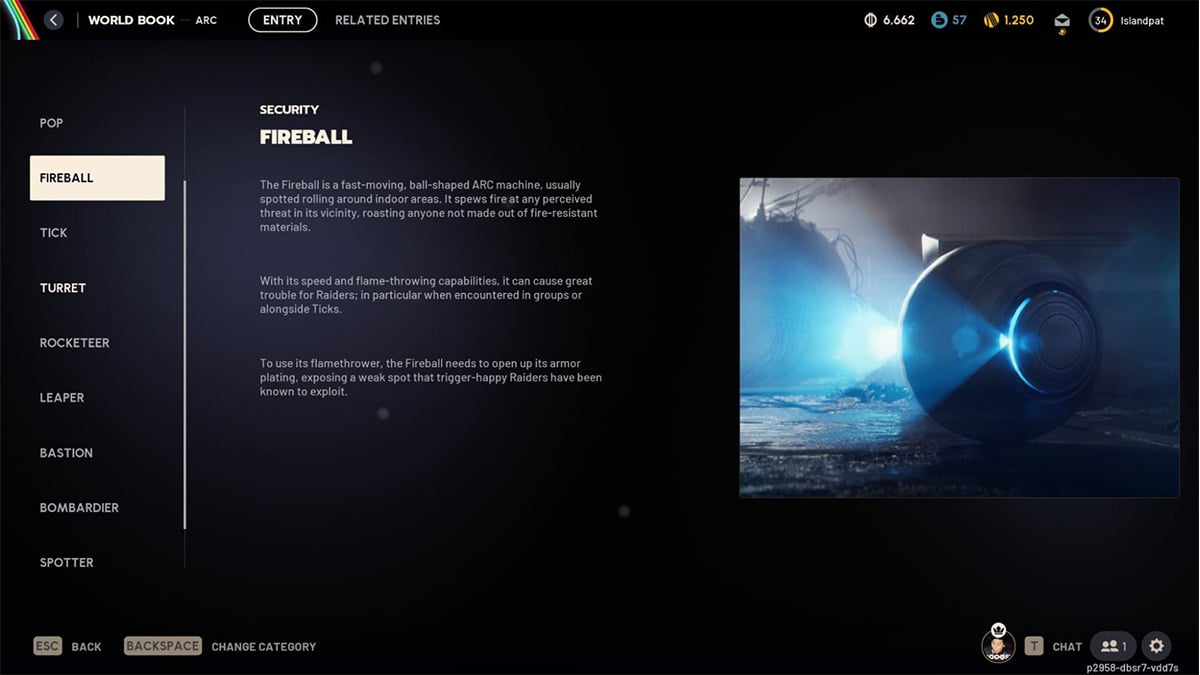
Fireballs are small armored ARCs that roll across the ground and close distance quickly before unleashing a burst of flame. They are more durable than Pops but far more dangerous if they reach you, since their flamethrowers can melt shields and health in seconds. Fireballs usually patrol in small roaming groups and often catch players off guard when rounding corners or entering enclosed spaces.
Attack pattern: Fireballs use a short-range flamethrower that activates the moment they get close enough. Before firing, they open a side or front panel to reveal internal burners, giving you a brief visual cue to attack.
Weakpoints and strategy: The outer armor resists light ammo, so wait for the moment the Fireball opens its panel and exposes the soft inner core. Medium and heavy ammo will break it quickly, and even light ammo becomes effective once the core is visible. Keep your distance at all times, because Fireballs ignite the ground on death and leave behind a lingering fire patch that can still deal damage if you are too close.
8. Surveyor
Loot: Main debris: ARC Alloy, ARC Powercell, ARC Motion Core, ARC Circuitry, Advanced ARC Powercell, Sensors, Surveyor Vault; Small debris: ARC Alloy, ARC Motion Core, Advanced ARC Powercell, Surveyor Vault
XP: 200 XP for destroying it, 300 XP for the core, 100 XP per additional part
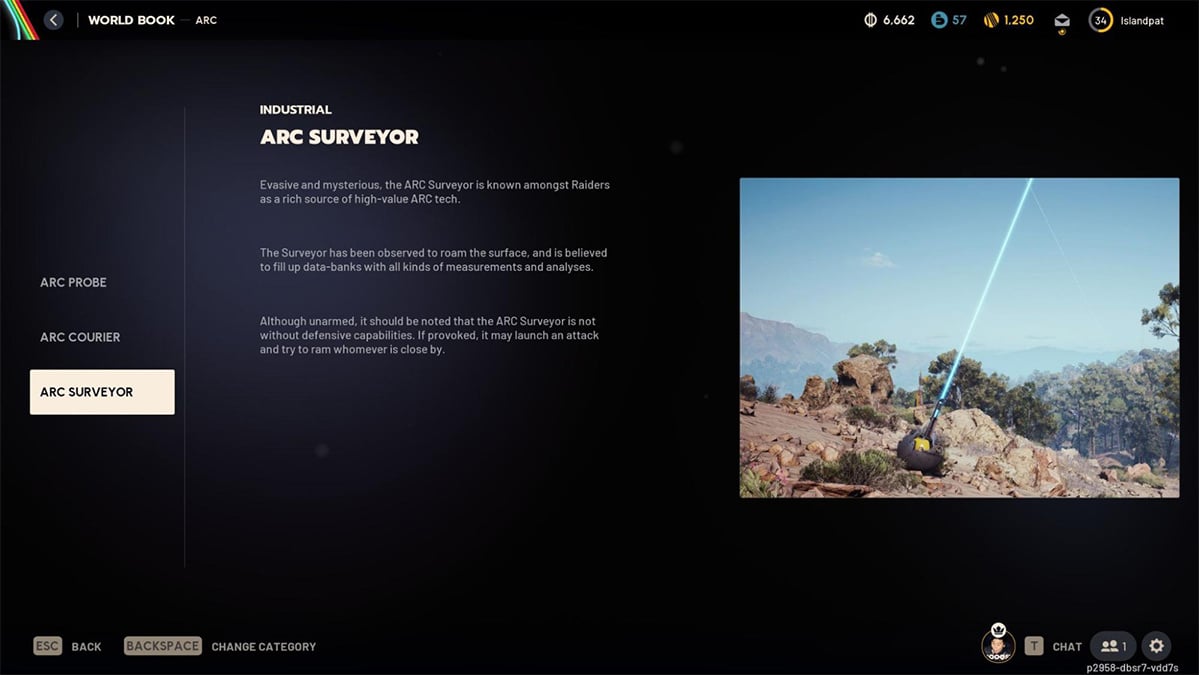
Surveyors are large, heavily armored spherical reconnaissance ARCs that roll across terrain and periodically stop to broadcast data to nearby units. They behave more like loot goblins than combatants, often fleeing the moment they take damage. Despite their tendency to run, Surveyors carry some of the best mid-tier components in the game, making them high-value targets if you can intercept them before they escape.
Attack pattern: Surveyors rarely fight back. Their default behavior is to retreat once alerted. If cornered with no path left, they rev up and launch themselves forward at high speed, dealing significant collision damage before attempting to flee again.
Weakpoints and strategy: The Surveyor briefly exposes its internal core whenever it stops to scan. This is the ideal moment to strike, especially with heavy ammo or grenades that can instantly crack the armor. As the Surveyor takes damage, it sheds multiple armor plates that become lootable parts, so aim to break as many pieces as possible. Because these ARCs often flee in a straight line, position yourself along their escape route or use terrain to trap them. Heavy fuse grenades are particularly effective and can eliminate a Surveyor in one well-timed throw.
9. Turret
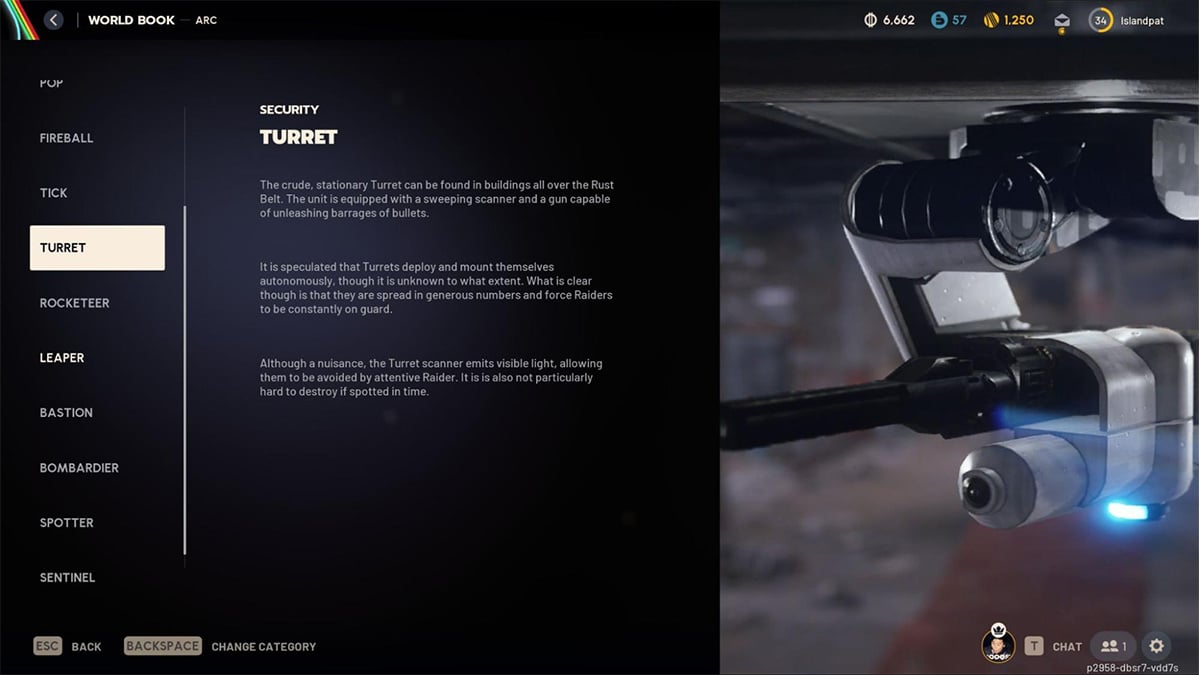
Loot: ARC Alloy, Light Ammo, Simple Gun Parts
XP: 100 XP for destroying it, 200 XP for looting
Turrets are small, static defense units mounted on interior walls and corridors. They rotate to track movement and immediately open fire once they detect a Raider, making them dangerous in tight spaces where line of sight is hard to break. Although unarmored, their rapid-fire bursts can quickly drain shields if you get caught peeking the wrong angle.
Attack pattern: Turrets fire a continuous stream of bullets at any Raider in direct view, and they continue shooting at your last known position even after you move out of sight. Their scan cycle resets quickly, so players need to commit to destroying them rather than ducking in and out.
Weakpoints and strategy: Turrets have no armor and extremely low durability, so any weapon can dismantle them in seconds. The safest approach is to avoid their line of sight by rotating around corners, then quickly lean or strafe out to destroy them before they reacquire the target. Because they are stationary, a single precise burst or shotgun blast is usually enough.
10. Sentinel

Loot: ARC Alloy, Advanced ARC Powercell, ARC Coolant, ARC Synthetic Resin, ARC Thermo Lining, ARC Motion Core, Sentinel Firing Core, Heavy Ammo
XP: 200 XP for destroying it, 300 XP for looting
Sentinels are medium-sized unarmored turret ARCs placed on rooftops, ledges, and raised outdoor platforms overlooking wide open areas. Their purpose is long-range area denial, and they specialize in picking off Raiders who expose themselves without cover. With 300 health and a powerful single-shot heavy projectile, Sentinels are among the most dangerous static defenses in the Rust Belt.
Attack pattern: Sentinels track players with a thick orange targeting laser. As they lock on, multiple thinner lasers converge on the target to indicate an imminent shot. After a short delay, the Sentinel fires a Heavy Ammo round that deals major impact damage. If the player breaks line of sight, the turret will still fire at their last known position, making mistimed peeks extremely risky.
Weakpoints and strategy: The Sentinel’s weak point is a small yellow capsule mounted on the rear of its swiveling arm. Medium or heavy rounds destroy it efficiently. Because Sentinels have slow reaction times and fire at a low rate, you can often outshoot them by taking quick peeks from behind solid cover. Dodging or sliding can evade incoming shots, but the safest method is to stay behind terrain and only expose yourself long enough to deliver accurate shots to the capsule. Remaining out of sight for a few seconds also resets their targeting cycle, giving you additional breathing room.
11. Leaper

Loot: Main debris: ARC Alloy, ARC Flex Rubber, ARC Performance Steel, Advanced ARC Powercell, Explosive Compound, Mechanical Components, Leaper Pulse Unit; Small debris: ARC Alloy, ARC Performance Steel, Advanced ARC Powercell, Mechanical Components, Leaper Pulse Unit
XP: 500 XP for destroying it, 600 XP for the core, 500 XP per additional part
Leapers are heavily armored arachnid-style ARCs that rely on brutal mobility and close-range pressure. They leap enormous distances, scale vertical surfaces, and can reach high vantage points that most Raiders assume are safe. Leapers thrive in close quarters where their melee attacks and shockwaves can wipe a team in seconds, making them one of the most feared enemies in the game.
Attack pattern: A Leaper locks onto a target and jumps forward with extreme speed, attempting to land directly on top of the Raider to deal massive melee damage. After landing, it emits a wide kinetic energy pulse that destroys shields and chunks health, punishing any player who remains nearby. Leapers will continue to reposition by jumping again and again, staying relentlessly aggressive until destroyed.
Weakpoints and strategy: The most effective weak points are the leg joints and the central eye. Breaking multiple leg joints slows the Leaper and eventually immobilizes it, making it far safer to finish off. Heavy ammo is strongly recommended, as it breaks armor plates and exposes internal components faster. Fire damage is also highly effective, so Blaze Grenades or Fireball Burners can rapidly soften the Leaper and interrupt its attack flow. Always avoid open terrain, use structures to block its jump paths, and coordinate with teammates to stagger heavy fire.
12. Bastion

Loot: Main debris: ARC Alloy, ARC Powercell, ARC Motion Core, ARC Circuitry, Advanced ARC Powercell, Mechanical Components, Medium Gun Parts, Bastion Cell, Medium Ammo; Small debris: ARC Alloy, ARC Powercell, ARC Motion Core, Mechanical Components, Bastion Cell
XP: 500 XP for destroying it, 500 XP for the core, 250 XP per part looted
Bastions are massive, slow-moving fortress units covered in thick armor plating. They dominate whatever area they patrol, using overwhelming gatling fire to control open spaces and punish anyone caught out of cover. Raiders often encounter Bastions near valuable resource deposits, suggesting these ARCs are deployed to protect high-priority zones. Their firepower is unmatched among ground units, and a careless peek can reduce a full-health Raider to nothing in seconds.
Attack pattern: The Bastion emits a loud mechanical screech when alerted, then unloads continuous gatling fire for several seconds at the last known position of any Raider it detects. Even if you break line of sight, the Bastion continues firing at your previous location, forcing you to stay fully behind cover until it pauses. Because of the high volume of bullets, open-field engagements are almost always fatal.
Weakpoints and strategy: Although heavily plated, the Bastion has several unarmored weak points. The yellow leg joints and the yellow canister on its rear can be damaged quickly, and destroying either one briefly stuns the Bastion. This stun window gives players a valuable chance to reposition or focus fire. Destroying the rear canister also peels back a protective plate, exposing a large barrel-shaped core that takes significantly increased damage. Heavy ammo is ideal for cracking armor, but Blaze Grenades and Snap Blast Grenades are also highly effective, especially during stun periods. The safest approach is to fight from buildings, rock formations, or thick foliage to avoid its line of sight entirely.
13. Spotter

Loot: Spotter Relay, ARC Alloy, ARC Powercell, Sensors
XP: 100 XP for destroying it, 200 XP for looting
Spotters are lightweight recon drones that operate solely to enhance the Bombardier’s accuracy. They hover at higher elevations, scan the area, and project a marking laser onto any Raider within line of sight. Although Spotters do not deal direct damage, their tracking dramatically boosts the Bombardier’s effectiveness by enabling long-range, precision artillery strikes.
Attack pattern: Spotters do not attack the player. Instead, they maintain a continuous laser lock on a target, allowing the Bombardier to fire accurately from very long distances. The marking laser only works while the Spotter has clear line of sight, but it can still tag you in places where the Bombardier itself cannot shoot.
Weakpoints and strategy: Spotters have exposed thrusters that can be destroyed quickly with any ammo type. Eliminating both Spotters temporarily blinds the Bombardier, but they respawn after a short time, making it inefficient to kill them repeatedly. A better approach is to break line of sight by entering buildings or moving behind solid terrain, or to use quick-use items to stun or disorient the Spotter. Once the Bombardier is defeated, the remaining Spotters retreat from the area.
14. Bombardier

Loot: Main debris: ARC Alloy, ARC Powercell, ARC Performance Steel, Advanced ARC Powercell, Mechanical Components, Medium Gun Parts, Bombardier Cell, Launcher Ammo; Small debris: ARC Alloy, ARC Powercell, ARC Performance Steel, Advanced ARC Powercell, Mechanical Components, Bombardier Cell
XP: 500 XP for destroying it, 300 XP per part looted
Bombardiers are high-threat artillery platforms and one of the most lethal enemies in ARC Raiders. With over two thousand health and the ability to fire precise mortar rounds from extreme distances, a Bombardier can eliminate Raiders who think they are safe behind cover. Its attacks are guided by Spotter drones that track players with a laser, allowing the Bombardier to adjust shots mid-flight, thread rounds through windows, and follow movement patterns with deadly accuracy.
Attack pattern: Once a Spotter marks a Raider, the Bombardier fires continuous mortar rounds until the target is either downed or out of sight. These rounds hit hard and carry significant splash damage. After each artillery burst, the Bombardier enters a brief recovery state that creates a valuable attack window. It can also emit kinetic energy shockwaves at close range, punishing players who try to rush it without planning.
Weakpoints and strategy: All leg joints have exposed yellow kneecaps that take increased damage. Breaking these joints slows the Bombardier and opens up unarmored sections. The rear yellow cylinder is the most important weak point, since destroying it can quickly disable the entire unit. Eliminating both accompanying Spotter drones temporarily blinds the Bombardier and makes its aim far less precise, but Spotters will respawn, so use that window to reposition rather than wasting ammo trying to keep them down. Heavy ammo is strongly recommended, and the safest time to deal damage is immediately after it fires its main artillery burst.
15. The Queen

Loot: Main debris: ARC Alloy, Advanced ARC Powercell, ARC Motion Core, ARC Circuitry, ARC Coolant, ARC Flex Rubber, ARC Thermo Lining, ARC Synthetic Resin, ARC Performance Steel, Advanced Mechanical Components, Advanced Electrical Components, Complex Gun Parts, Magnetic Accelerator, Queen Reactor; Small debris: ARC Alloy, Advanced ARC Powercell, ARC Motion Core, ARC Circuitry, ARC Thermo Lining, ARC Synthetic Resin, ARC Performance Steel, Magnetic Accelerator, Queen Reactor
XP: 1000 XP for destroying her, 1000 XP for the core, 500 XP per additional part
The Queen is one of the largest and deadliest ARC in the game, appearing only during the Harvester Event as the final guardian of the Harvester itself. With full armor plating and an enormous health pool that exceeds thirty thousand, the Queen requires a coordinated group of Raiders, heavy weaponry, and sustained fire to bring down. Fighting her solo is effectively impossible, and even large teams must work together to survive her overwhelming arsenal of area-control attacks.
Attack pattern: The Queen cycles through several devastating abilities. She fires clusters of mortar rounds from the top of her dome, creating delayed fiery explosions that blanket large areas in burning ground. Periodically, she unleashes a sustained laser beam that sweeps across terrain and leaves a scorched trail that continues to deal damage on contact. When Raiders attempt to close in, she alternates between an EMP pulse that disables shields and a ground slam that sends out a destructive shockwave. Her attack coverage is massive, making open terrain extremely unsafe.
Weakpoints and strategy: Although fully plated, the Queen has two reliable weak point types. Breaking the armor on her legs exposes yellow joints that take significantly increased damage. She also reveals a vulnerable head core when charging or firing her laser; Raiders positioned on elevated terrain can target this core for much higher damage values. Heavy ammo, explosives, and specialized grenades are essential, as lighter weapons struggle to penetrate her plating. The safest strategy is to fight from inside structures with solid roofs to avoid mortar impacts, while coordinating heavy fire on joints and timing burst damage during her recovery phases.
16. Harvester

Loot: Between 1 and 3 Blueprints (always the Equalizer or Jupiter), plus a variety of ARC items
XP: 500 per part looted
The Harvester is a high risk-reward dynamic ARC event found on Dam Battlegrounds, Acerra Spaceport, and occasionally Blue Gate. It is a massive ARC structure defended by lethal environmental hazards and guarded by the Queen. Completing the Harvester does not require defeating the Queen, but Raiders must navigate rotating fire blasts, periodic electric pulses, and multiple timed phases to reach the core loot chamber. The event is significantly easier with a coordinated group, though still possible solo with patience and careful movement.
How the Harvester works: The structure contains a central column with three power ports and several breachable panels on the upper floor. Every forty-five seconds, the Harvester fills the chamber with fire and periodically emits electricity that strips shields. Raiders must time their movement to avoid these cycles while progressing through the puzzle.
Phase 1: Access the Harvester: Raiders begin by breaching one of the three exterior entrance doors while avoiding the Queen’s patrol. Inside, they will see the central column, access lifts, and the environment’s fire and electricity hazards. Staying inside too long during a fire cycle is deadly, so players should plan safe exits and reentries.
Phase 2: Retrieve and install power cells: Three power cells must be collected: one on the ground floor and two hidden behind breachable panels upstairs. Raiders need to exit the Harvester each time a fire cycle begins, reenter once it subsides, and continue searching. Pre-positioning all three canisters next to their respective ports saves time. When a fire wave ends, Raiders can rush in, open the doors, and insert all three power cells into the central column to activate the final phase.
Phase 3: Destroy all yellow nodes: Once the canisters are installed, yellow nodes extend from the walls around the room. Raiders must destroy every node while avoiding fire blasts and electric pulses. If the nodes retract, it signals another impending fire cycle and players must exit immediately. After the room resets, Raiders reinsert the canisters to bring the remaining nodes back out. Destroying all nodes unlocks three high-value loot containers at the central column.
17. Matriarch

Loot: Main debris: ARC Alloy, ARC Circuitry, ARC Performance Steel, Advanced ARC Powercell, ARC Flex Rubber, ARC Motion Core, ARC Synthetic Resin, ARC Thermo Lining, Magnetic Accelerator, Matriarch Reactor; Small debris: ARC Alloy, ARC Circuitry, ARC Performance Steel, Advanced ARC Powercell, ARC Flex Rubber, ARC Synthetic Resin, Magnetic Accelerator, Matriarch Reactor
XP: 1000 XP for destroying her, 1000 XP for the core, 500 XP per additional part
The Matriarch is an enormous full-plated ARC war machine that surpasses even the Queen in overall threat level. She appears only during a specific map condition and acts as a roaming endgame boss with a toolkit designed to overwhelm entire squads. Between homing rockets, gas mortars, flashbangs, and the ability to summon multiple ARC units at once, the Matriarch forces players to fight with precision, positioning, and constant awareness.
Attack pattern: The Matriarch fires volleys of explosive homing rockets that track players aggressively and are by far her most dangerous ability. She follows these attacks with gas mortars that leave stamina-draining clouds on impact, slowing escapes and punishing repositioning. She can deploy a large energy shield that absorbs all incoming projectiles; Raiders can pass through the shield, but shooting into it from the outside is pointless. She also launches flashbang rounds that blind and deafen any player caught in the burst. During longer fights, she summons ARC reinforcements including Fireballs, Wasps, Leapers, Bastions, Bombardiers, and Rocketeers.
Weakpoints and strategy: The Matriarch’s legs are heavily plated and not worth targeting. Instead, focus on breaking the face plates to reveal her large red core, which takes significantly increased damage. Heavy ammo and explosives are strongly recommended. When her energy shield activates, stop firing and wait for it to drop, unless you choose to slip inside the shield and take close-range shots at the exposed core. High ground and solid cover make the fight far more manageable. Elevated areas such as the Spaceport Control Tower, the Dam Breach tunnels, and the reinforced reception at Blue Gate can turn the encounter in your favor by limiting the number of ARC reinforcements that can reach you.
18. Shredder
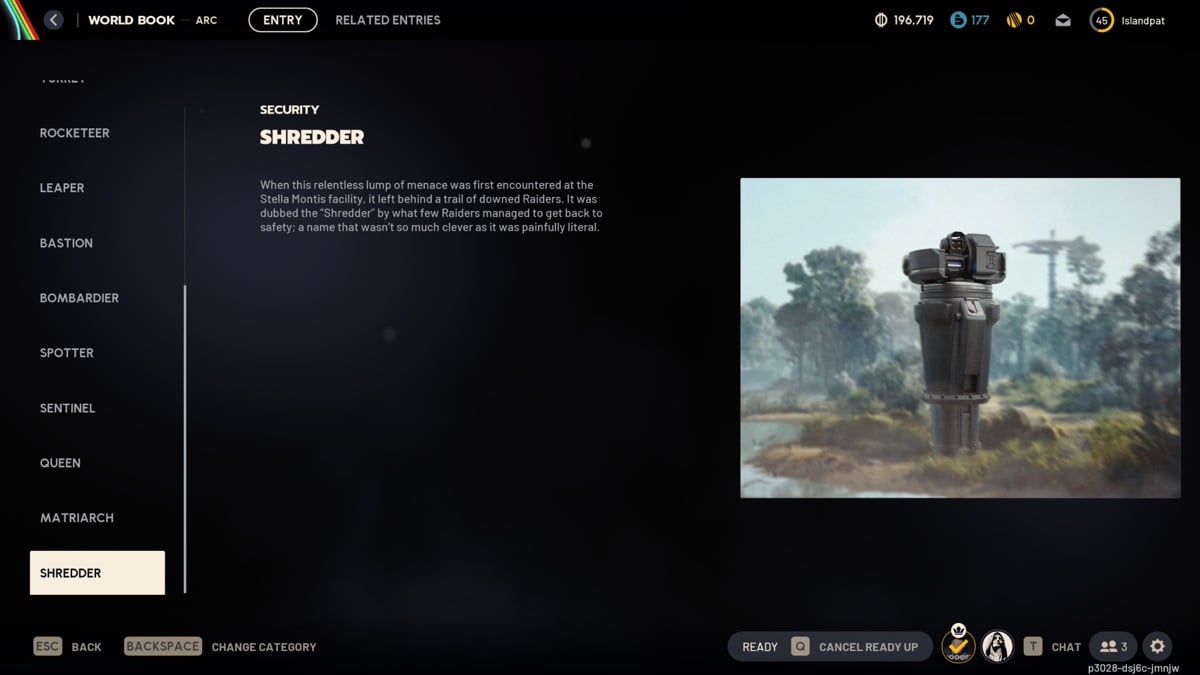
Loot: ARC Alloy, ARC Powercell, Shredder Gyro, Shotgun Ammo, Simple Gun Parts, Mechanical Components
XP: 200 XP for destroying it, 250 XP for looting
The Shredder is a slow but brutal close-quarters ARC found inside the tight corridors of Stella Montis. Its first recorded appearance left multiple Raiders incapacitated due to the sheer force of its shrapnel blasts. The name “Shredder” was not chosen for creativity but because Raiders who survived described its attacks as shredding anything caught in its path. This ARC specializes in enclosed spaces, where movement is limited and escape routes are narrow.
Attack pattern: The Shredder fires a four-round burst of shrapnel in all directions, turning hallways and small rooms into lethal kill zones. Raiders have reported that the unit sometimes pauses, charges up, and releases a more concentrated blast aimed directly at the player. Because its attacks spread widely, staying exposed at close range is extremely dangerous.
Weakpoints and strategy: The most reliable way to shut down the Shredder is to target its thrusters with heavy ammo. Breaking the thrusters slows its mobility and interrupts its attack flow. The safest approach is to peek from behind cover, deal quick damage to the thrusters, then duck back before the shrapnel burst fires. Repeat this pattern until it collapses. Fighting the Shredder in open areas reduces its effectiveness, but encounters usually occur inside the Stella Montis facility, so cover discipline and controlled aggression are key.
19. ARC Probe

Loot: ARC Alloy, ARC Circuitry, ARC Motion Core, ARC Powercell
XP: 500 for looting
ARC Probes are static, non-hostile ARC units designed to drill and scan the ground for unknown objectives tied to Speranza. They do not engage Raiders in combat, but their presence suggests significant ARC interest in the surrounding area. Celeste warns that previous discoveries involving Probes ended badly, making them a point of concern in the field.
Attack pattern: Probes have no offensive capabilities. However, breaching a Probe emits a loud signal pulse that can attract nearby ARCs or alert enemy players, creating a risk window while looting.
Weakpoints and strategy: Probes are not destroyed in combat but instead breached for loot. Upright variants can be breached on all three sides, while crashed or partially buried variants are only breachable on whichever panel remains accessible. Because breaching makes noise, clear the surrounding area or loot quickly to avoid being ambushed.
20. Vaporizer (updates coming soon)

Loot: Unknown
XP: Unknown
A new flying ARC type has been spotted around the surface, and it is already drawing attention from Raiders. Known for its powerful laser attacks and unusual attack patterns, this enemy has earned the nickname Vaporizer.
Early rumors suggest the Vaporizer may combine a beam attack similar to the Queen’s with movement patterns that resemble a Rocketeer. If true, that would make it a dangerous flying enemy that is harder to track and predict than standard ARC types.
Because the Vaporizer has not been released yet, details remain unconfirmed. We will update this article once the enemy officially appears in-game on March 31st.
Attack Pattern: Unknown
Weakpoints and strategy: Unknown
Conclusion
Mastering ARC Raiders is all about understanding how each enemy behaves, what their weak points are, and how to approach every encounter with intention instead of panic. Once you learn which ARCs to avoid, which ones to prioritize, and how to exploit their predictable attack patterns, the entire game becomes more manageable and far more rewarding. Whether you are grounding Rocketeers, dismantling Bastions, or coordinating a team push against the Queen, preparation is the real key to survival.
If you want to level up your setup in the real world too, check out the Acer Store for gaming laptops and accessories that can keep up with long sessions and high-action games. Students can also take advantage of the Acer Student Discount program, which offers savings on everything from lightweight school laptops to high-performance gaming rigs. It is a great way to upgrade your gear for less while you take on the ARC.
For more Arc Raiders tips, guides, and detailed breakdowns, be sure to check out our other articles below:
Recommended Products

Predator Helios 18 AI (RTX 5090)
Buy Now |

Predator Helios Neo 18 AI (RTX 5070 Ti)
Buy Now |

Acer Nitro V 16S (RTX 5070)
Buy Now |
|---|


