Dual booting Linux and Windows 11 allows you to run two operating systems on the same computer and choose between them at startup. For developers, IT professionals, gamers, and power users, this setup combines Windows 11’s strong hardware compatibility and software ecosystem with Linux’s flexibility, performance efficiency, and control. Instead of relying on virtual machines or secondary devices, dual booting gives each operating system full access to your hardware, making it ideal for tasks like software development, cybersecurity testing, data science, and system administration while still keeping Windows available for everyday work, gaming, or proprietary applications.
This guide explains why you might want to dual boot, the real benefits, the risks involved and how to avoid them, and provides a step-by-step walkthrough for safely installing Linux alongside Windows 11. It also covers what to do after installation, including system updates, boot management, and performance optimization, so your dual-boot setup remains stable and secure long term.
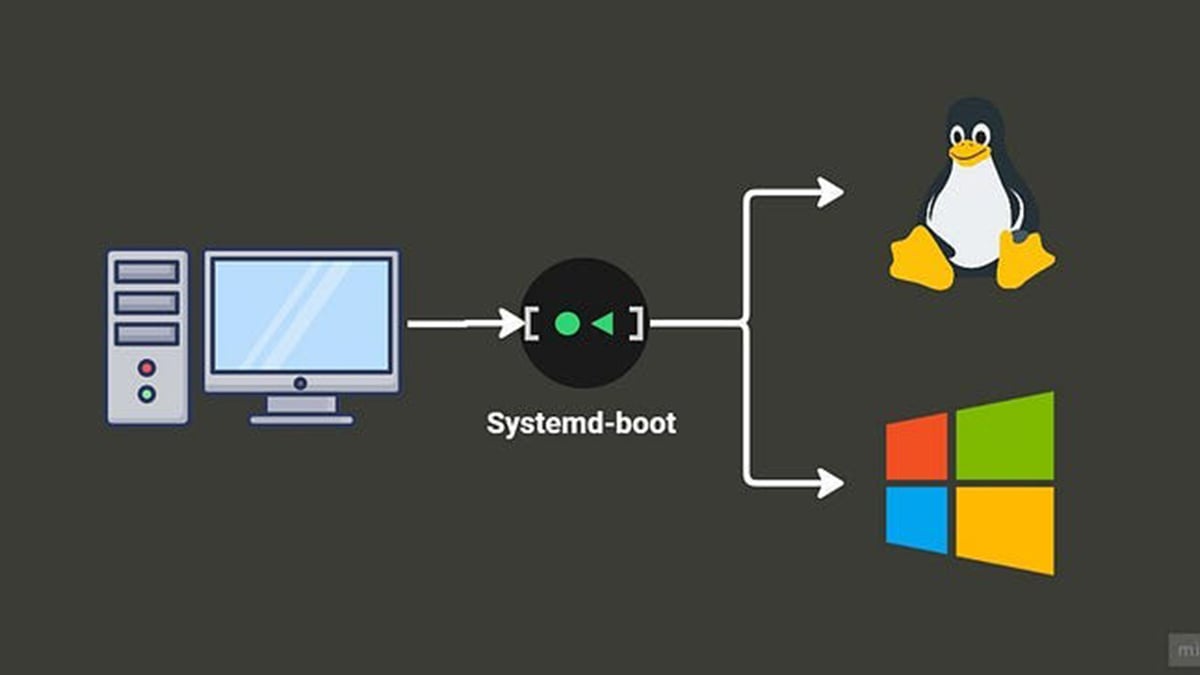
How dual booting works (overview)
At a high level, dual booting works by installing Linux on a separate partition of your computer’s storage while keeping Windows 11 intact. A bootloader, typically installed by Linux, allows you to choose which operating system to start when the computer powers on. Each system remains independent, with its own files, settings, and applications, but both share the same physical hardware.
In the sections that follow, we will break this process down in detail, starting with why people choose to dual boot in the first place, then moving into preparation, installation, risk mitigation, and post-installation best practices.
Why dual boot Linux and Windows 11 (use cases and scenarios)
Dual booting Linux and Windows 11 makes sense when you need the strengths of both operating systems without compromise. Rather than forcing everything into one environment, dual booting lets each OS do what it does best.
Common use cases include:
- Software development and engineering
Linux is often the preferred environment for backend development, containers, servers, and open-source tooling. Windows 11 remains useful for IDEs, commercial software, and testing Windows-specific builds. - Cybersecurity, networking, and IT work
Many security, forensics, and networking tools are built natively for Linux. Dual booting avoids the performance and hardware access limitations of virtual machines. - Data science and AI workloads
Linux offers better control over Python environments, CUDA tooling, and package managers, while Windows still handles productivity software and vendor-specific tools. - Gaming and general use
Windows 11 is still the most compatible platform for modern PC gaming and peripherals. Dual booting lets you keep Windows for games while using Linux for work or learning. - Learning Linux without giving up Windows
For users transitioning to Linux, dual booting provides a safety net. You can learn Linux at your own pace without abandoning familiar Windows workflows. - Performance and hardware access
Unlike virtual machines, dual booting gives Linux direct access to the CPU, GPU, storage, and networking hardware, which matters for performance-sensitive tasks.
In short, dual booting is ideal when you want native performance, full hardware access, and clear separation of workflows, without buying a second computer or relying on virtualization.
What are the benefits of dual booting Linux and Windows 11
Dual booting is not just about having two operating systems. It is about getting full performance, flexibility, and control without sacrificing compatibility.
Key benefits include:
- Native performance on both operating systems
Each OS runs directly on the hardware. There is no virtualization overhead, no shared RAM limits, and no reduced GPU performance. - Full hardware access
Linux can directly access the CPU, GPU, storage controllers, USB devices, and networking hardware. This is critical for development, security testing, machine learning, and low-level system work. - Clear separation of environments
Windows and Linux remain isolated from each other. System updates, drivers, and software changes in one OS do not affect the other. - Better than virtual machines for demanding workloads
Virtual machines are convenient, but they struggle with GPU acceleration, disk I/O, and power management. Dual booting avoids these limitations entirely. - No need for a second computer
You get two full operating systems on one machine, saving cost and desk space while keeping workflows separate. - Greater control and customization
Linux allows deep system customization and transparency, while Windows 11 maintains access to commercial software, enterprise tools, and games. - Long-term flexibility
If your needs change, you can adjust partitions, remove one OS, or switch your primary system without reinstalling everything from scratch.
For users who need Windows compatibility and Linux capability, dual booting offers the most balanced solution with the fewest trade-offs.
Potential risks of dual booting Linux and Windows 11 (and how to avoid them)
Dual booting is safe when done correctly, but most problems come from poor preparation rather than the process itself. Below are the real risks you should be aware of and how to prevent them.
1. Data loss during partitioning
Shrinking or modifying disk partitions always carries risk if done incorrectly.
How to avoid it:
- Back up important files before making any changes
- Resize partitions from Windows first using Disk Management
- Never delete or format existing Windows partitions during Linux installation
2. Windows updates overwriting the Linux bootloader
Major Windows 11 updates can sometimes override the Linux bootloader, making Linux temporarily unbootable.
How to avoid it:
- Use UEFI mode (not Legacy/CSM)
- Keep a Linux live USB available to repair the bootloader if needed
- This does not delete Linux data and is fixable in minutes
3. Secure Boot compatibility issues
Some Linux distributions may not boot if Secure Boot is misconfigured.
How to avoid it:
- Choose a Secure Boot–compatible distro (Ubuntu, Fedora, Linux Mint)
- If needed, disable Secure Boot temporarily in BIOS
- Do not mix Secure Boot changes mid-installation
4. BitLocker conflicts
BitLocker encryption can interfere with partition resizing or Linux access to shared drives.
How to avoid it:
- Suspend BitLocker before resizing Windows partitions
- Re-enable it after installation is complete
- Avoid mounting BitLocker-encrypted system partitions in Linux
5. Clock time mismatch between Linux and Windows
Linux uses UTC by default while Windows uses local time, which can cause clock drift.
How to avoid it:
- Configure Linux to use local time or adjust Windows registry settings
6. Driver and hardware compatibility concerns
Some hardware, especially Wi-Fi chips or GPUs, may require additional Linux drivers.
How to avoid it:
- Check Linux compatibility for your hardware beforehand
- Use popular distributions with strong driver support
- Install proprietary GPU drivers after setup if needed
When planned properly, dual booting is low risk and fully reversible. Most issues are configuration-related, not destructive, and can be avoided with backups, UEFI consistency, and careful partitioning.
Got it. I read the transcript, and I’m going to mirror the same practical framing: keep Windows for the apps you paid for, add Linux for speed, efficiency, and privacy, and make it easy to undo later.
How to dual boot Linux and Windows 11 (step-by-step, detailed)
Before you start: the point of this setup
A dual boot environment gives you two fully separate operating systems on one PC. You choose which one to load at startup. This is ideal if you:
- Need Windows-only apps (work software, Adobe, certain games, specialty utilities)
- Want Linux for everyday browsing, documents, development, or a lighter OS on older hardware
- Want a “no commitment” path where either OS can be removed later
Part 1: What you need
Hardware and basics
- A USB flash drive (8 GB or larger)
4 GB can work for some distros, but 8 GB+ avoids headaches. - At least 30 GB of unallocated space for Linux
50–60 GB is a better minimum if you plan to actually use Linux. - Admin access in Windows 11
- A reliable backup (non-negotiable)
If partitioning goes wrong, the backup is what saves you.
Choose a Linux distribution
If you’re coming from Windows and want something that “feels familiar,” the transcript’s pick is a solid default:
- Linux Mint Cinnamon (Windows-like desktop, beginner-friendly)
Other good options (if you want alternatives later):
- Ubuntu (huge community)
- Fedora (modern, clean defaults)
For this guide, I’ll assume Linux Mint Cinnamon, since that’s what the transcript uses and it’s beginner-friendly.
Part 2: Prep Windows 11 the right way (this prevents most disasters)
1) Back up what matters
Do at least one of these:
- Copy files to an external SSD/HDD
- Use a cloud backup you trust
- Create a full system image if you want maximum safety
If you only do one thing from this whole section, do the backup.
2) Check whether BitLocker is enabled (and suspend it)
BitLocker can interfere with resizing and can complicate boot changes.
- Open Start → search “Manage BitLocker”
- If it’s on for your C: drive:
- Click Suspend protection (do not “turn off” unless you understand the difference)
- You can re-enable after Linux is installed and booting correctly
3) Disable Fast Startup (prevents weird boot and disk issues)
Fast Startup can cause Windows to leave the disk in a “half-hibernated” state.
- Control Panel → Power Options
- Choose what the power buttons do
- Click Change settings that are currently unavailable
- Uncheck Turn on fast startup
- Save
4) Make sure you’re using UEFI mode (recommended)
Most Windows 11 systems are already UEFI.
- Press Win + R → type msinfo32
- Look for:
Dual booting works best when both OS installs use the same mode (UEFI).
Part 3: Create the Linux USB installer (Windows 11)
1) Download the Linux ISO
- Download the Linux Mint Cinnamon ISO from the official Mint download page (choose a mirror close to you).
- Note where it saves (usually Downloads).
The ISO is often around a few gigabytes, so it may take a bit.
2) Create a bootable USB with Rufus
The transcript mentions the Mint guide recommends Balena Etcher, but it failed for the creator, so they used Rufus. Rufus is a standard choice on Windows.
- Download and run Rufus
- Insert your USB drive
- In Rufus:
- Device: select your USB drive (triple-check this)
- Boot selection: select the Mint ISO
- Leave defaults unless you know what you’re doing
Important warning: this wipes the USB drive completely. Do not use a USB stick that has files you care about.
Click Start and let it finish.
Part 4: Create space for Linux (shrink Windows partition)
This step is a big one. The goal is to create unallocated space that Linux can install into.
1) Open Disk Management
- Right-click Start
- Select Disk Management
2) Shrink the Windows (C:) partition
- Find the C: partition (your main Windows drive)
- Right-click C: → Shrink Volume
- Enter how much to shrink by
Quick sizing rule:
- Testing Linux: 30,000 MB (30 GB)
- Comfortable use: 50,000–100,000 MB (50–100 GB)
After shrinking, you should see a block labeled Unallocated.
Stop here. Do not create a new Windows volume in that unallocated space. Leave it unallocated. The Linux installer will handle it cleanly.
Part 5: Boot into the Linux USB (two good methods)
Method A (easy and reliable): Shift + Restart from Windows 11
This is the transcript’s method and it’s great if you don’t want to guess function keys.
- Keep the USB plugged in
- Hold Shift
- Click Restart
- On the recovery screen:
- Use a device
- Choose the USB drive (may show as “UEFI: ”)
Method B: Boot menu function key
On power-on, use your boot menu key (often F12, F9, Esc, etc). This varies by manufacturer.
Part 6: Try Linux before installing (highly recommended)
Most distros let you run a “live” desktop from the USB.
Why you should do this:
- Confirms Wi-Fi works
- Confirms keyboard and trackpad work
- Confirms display scaling and resolution are usable
You can’t really “break” Windows from the live environment unless you start the installer and choose destructive options.
Part 7: Install Linux alongside Windows 11 (the safest path)
1) Start the installer from the live desktop
On Mint, it’s usually an icon like “Install Linux Mint”.
2) Language and keyboard layout
- Choose English
- Keyboard: typically English (US) for American users
3) Multimedia codecs (usually yes)
Mint offers “Install multimedia codecs.”
If you want better media playback support out of the box, check it.
4) Installation type: this is the decision that matters
You will see options like:
- Erase disk and install Linux (do not choose this)
- Install Linux Mint alongside Windows Boot Manager (this is the one you want)
Select:
Install alongside Windows Boot Manager
This tells the installer:
- Keep Windows intact
- Put Linux in the free (unallocated) space
- Set up a boot menu so you can choose Windows or Linux at startup
5) Confirm partition changes
The installer will warn that it’s going to write changes to disk and create Linux partitions in the unallocated space.
This is your last safe checkpoint:
- If it shows it’s touching your Windows partitions in a way you don’t expect, stop and go back.
- If it’s clearly using only the unallocated space, proceed.
6) Time zone
Pick your time zone. For US readers, this is where you choose Eastern, Central, Mountain, Pacific, etc.
7) Create your Linux user
- Name, computer name, username, password
- Many installers require lowercase usernames (normal Linux convention)
Login choice:
- Log in automatically is convenient on a personal device
- Require password is better for security, especially on a laptop
Encryption choice:
- Encrypting your home folder improves security
- It can add complexity if you’re new
A practical approach: - If you’re new: skip encryption for now, add it later once you’re comfortable
- If you travel or store sensitive data: consider encrypting
8) Install
Let the installer run. This may take several minutes.
9) Reboot and remove the USB when prompted
When installation finishes:
- Restart
- Remove the USB drive when the prompt tells you to
- Press Enter to continue booting
Part 8: First boot after installation (what you should see)
On restart, you should see a boot menu (often GRUB) where you can choose:
- Linux Mint
- Windows Boot Manager
If you do nothing, it usually defaults to Linux after a timeout.
Test both immediately:
- Boot Linux, confirm you reach desktop
- Reboot, choose Windows Boot Manager, confirm Windows is normal
That moment matters because it proves your dual boot is stable.
Part 9: Troubleshooting the most common problems
“I don’t see Windows in the boot menu”
- You can usually still boot Windows by selecting Windows Boot Manager in BIOS/UEFI boot options
- In Linux, tools like Boot Repair exist, but don’t guess. The main goal is: Windows is still on disk and usually recoverable.
Wi-Fi doesn’t work in Linux
This is often a driver/firmware issue, especially on some laptop Wi-Fi chipsets.
- If Ethernet is available temporarily, it makes driver setup easier
- On Mint, Driver Manager can help with proprietary drivers
Time is wrong when switching between Windows and Linux
Windows uses local time by default, Linux often uses UTC.
Fix it by configuring Linux to use local time (common fix) or adjusting Windows settings.
Part 10: After you’ve done it, what now?
1) Update Linux immediately
On Mint:
- Use Update Manager
- Apply system updates
This improves stability, driver support, and security.
2) Install drivers if needed
- For NVIDIA GPUs, you may want proprietary drivers for best performance
- Mint often makes this easier through its driver tools
3) Decide how you want to use each OS
A sensible split (matches the transcript’s logic):
- Linux: browsing, docs, daily work, lightweight performance
- Windows: paid apps, Windows-only tools, some games, device-specific utilities
4) Set expectations about files
Your systems are separate. You can:
- Keep separate documents per OS
- Or create a shared data partition (a more advanced but useful optimization)
5) Keep your exit plan simple
Dual boot is valuable partly because it’s reversible:
- If you decide Linux isn’t for you, you can remove Linux partitions and restore Windows boot
- If you decide Windows isn’t for you, you can wipe Windows and go full Linux later
Now that you’ve dual booted Linux and Windows 11, what now?
At this point, you have what most people are actually trying to achieve: Linux for speed, efficiency, and privacy, and Windows 11 available on demand for the apps and workflows you cannot replace. The difference between a dual boot that feels “done” and one that becomes annoying is what you do next. Use this checklist to lock in stability, avoid common issues, and make the setup easy to live with.
1) Confirm both operating systems boot cleanly
Do this immediately while everything is fresh:
- Boot into Linux, confirm you reach the desktop, Wi-Fi works, and basic audio/display are fine.
- Reboot and boot into Windows 11, confirm your files and apps are unchanged and BitLocker (if you use it) behaves normally.
This sounds obvious, but it catches bootloader issues early, before you make additional changes.
2) Update Linux first (stability, security, and drivers)
Most Linux problems new users hit are solved by updates.
- Open your distro’s update tool (on Mint, Update Manager).
- Install all recommended updates.
- Reboot if prompted.
This step improves hardware support, security patches, and overall reliability.
3) Install the right drivers, especially GPU and Wi-Fi
If you want Linux to feel fast and trouble-free, drivers matter.
GPU
- If you have NVIDIA, proprietary drivers often provide better performance and fewer glitches than the default open driver.
- If you have AMD or Intel, things usually “just work” out of the box, but updates still matter.
Wi-Fi / Bluetooth
- If Wi-Fi is flaky, it is often a chipset/firmware issue.
- Use your distro’s driver tool where available, or update firmware packages through the official repos.
The goal here is simple: get Linux to a point where daily use does not require tinkering.
4) Decide your workflow split (this prevents frustration)
Dual boot works best when each OS has a clear purpose.
A practical setup:
- Linux: web browsing, documents, email, development work, lightweight daily computing, privacy-sensitive tasks
- Windows 11: paid software you already own, Windows-only apps, certain peripherals, certain games, enterprise tools
When you stop trying to make one OS do everything, dual booting starts to feel like an upgrade rather than a compromise.
5) Plan how you will handle files across both systems
You have two realistic options:
Option A: Keep files mostly separate (simplest)
- Store Linux work in Linux folders
- Store Windows work in Windows folders
- Use cloud storage for anything you truly need to share
Option B: Create a shared “data” partition (best long-term, slightly advanced)
- You create a dedicated partition formatted for sharing (often exFAT for simplicity)
- Both Windows and Linux can read/write it easily
- This reduces duplication and makes switching between OSes smoother
If you are writing this as a guide, call out Option A as the default for beginners, and Option B as an “upgrade” once the system is stable.
6) Make the boot menu predictable
Most dual boot installs will default to Linux after a timeout. You can leave it that way, or you can change the default OS depending on what you use most.
Best practice:
- Set the OS you use most often as the default
- Keep the boot timeout long enough that you can switch without rushing (even 5–10 seconds is fine)
This is a small quality-of-life change that makes the setup feel intentional.
7) Re-enable BitLocker if you suspended it
If you suspended BitLocker earlier:
- Boot into Windows 11
- Resume BitLocker protection
Do this after you have confirmed both OSes boot correctly. That order matters.
8) Keep a simple recovery plan (so you are never “stuck”)
Dual booting is flexible specifically because it is reversible.
If you ever decide Linux is not for you:
- You can remove Linux partitions and restore Windows boot
If you ever decide Windows is not for you:
- You can wipe Windows later and go full Linux
The key point for readers: dual booting is not a permanent commitment. It is a way to try Linux seriously without losing the Windows tools you still need.
Conclusion
Dual booting Linux and Windows 11 gives you flexibility without forcing a permanent decision. You keep access to Windows-only software that you may have paid for or still depend on, while gaining Linux’s speed, efficiency, and reduced background overhead for everyday tasks. When set up correctly, both operating systems remain isolated, stable, and easy to switch between.
The key to a successful dual boot is preparation. Backing up your data, resizing partitions carefully, and installing Linux alongside Windows rather than replacing it removes most of the risk. Once installed, keeping Linux updated, installing the correct drivers, and defining clear use cases for each operating system ensures the setup stays reliable over time.
Most importantly, dual booting is reversible. If Linux does not fit your workflow, it can be removed. If Windows becomes less important, it can be phased out later. That flexibility is what makes dual booting one of the safest and most practical ways to experience Linux while keeping Windows 11 available when you need it.
FAQ
Is dual booting Linux and Windows 11 safe?
Yes, dual booting is safe when done correctly. Most issues come from skipping backups or modifying the wrong partition. If you back up your data, shrink the Windows partition properly, and choose the “install alongside Windows” option, the risk is low.
Will dual booting delete my Windows files?
No. When you install Linux alongside Windows, your Windows files and applications remain unchanged. Linux is installed in separate disk space and does not overwrite your Windows installation.
Can Windows 11 updates break my Linux install?
Occasionally, major Windows updates may affect the bootloader. This usually does not delete Linux and can be fixed by repairing the bootloader with a Linux USB. Keeping both systems installed in UEFI mode reduces this risk.
How much disk space do I need for Linux?
Linux can run in as little as 30 GB, but that is only suitable for testing. For regular use, 50 to 60 GB or more is recommended so you have room for applications and updates.
Can I access my Windows files from Linux?
Yes, Linux can read and write to Windows data partitions. However, it is best to avoid modifying Windows system files from Linux. For shared documents, a dedicated data partition or cloud storage is safer.
Does dual booting slow down my computer?
No. Only one operating system runs at a time, so performance is native. In many cases, Linux will feel faster than Windows, especially on older hardware.
Should I use a virtual machine instead of dual booting?
Virtual machines are convenient for light testing, but they limit hardware access and performance. Dual booting is better if you need full CPU, GPU, and storage performance.
Can I remove Linux later if I do not like it?
Yes. You can delete the Linux partitions and restore the Windows boot process. Dual booting is not permanent and does not lock you into Linux.
Can I remove Windows later and keep Linux?
Yes. Once you are comfortable with Linux, you can wipe the Windows partitions and use Linux as your only operating system. This can be done without reinstalling Linux if planned correctly.
Is Linux good for older or unsupported Windows 11 hardware?
Yes. Linux has lower hardware requirements and often runs well on systems that cannot upgrade to Windows 11. Dual booting is a good way to extend the life of older PCs without giving up Windows entirely.
Recommended Products


